Sunol Felt Art Project
March 2011
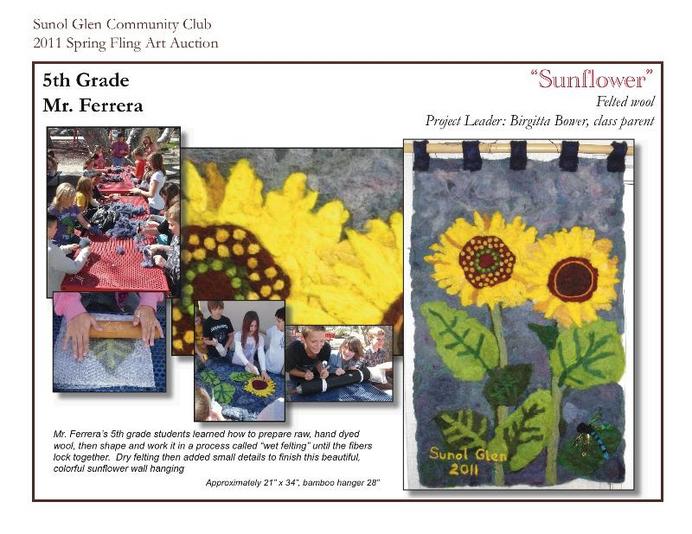
5th graders making a sunflower wall hanging
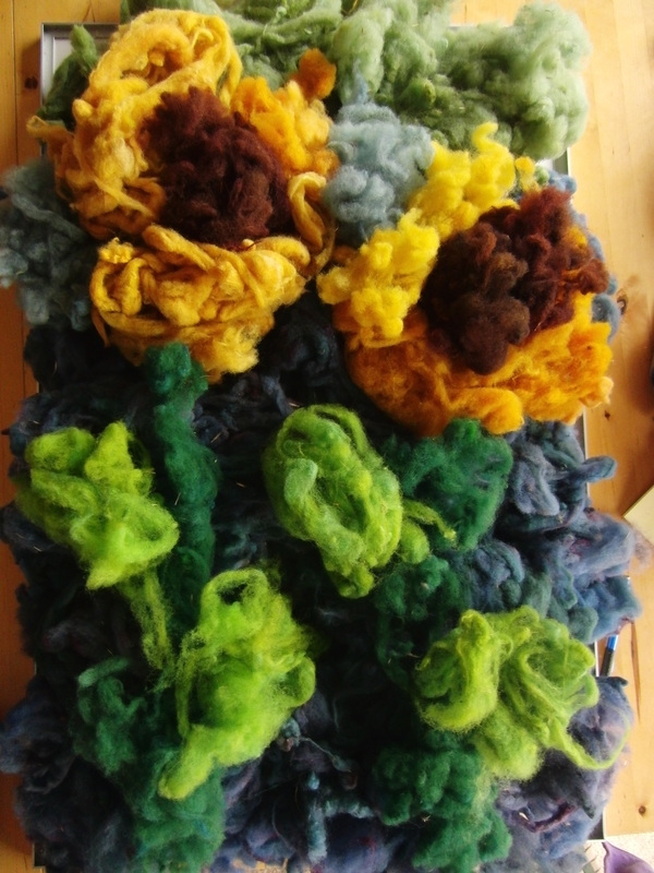
Wool laid out loosely (no felting yet)
just to get an idea of colors and size
Project: Create something beautiful together that can
be auctioned off at the Spring Fling to fund
programs at our school.
Artists: All of 5th grade
Plan: Some students prepare the parts of the sun
flowers while the rest work on the background.
Then we combine it all!
Needed:
- lots of wool
- combs for combing the wool
- bubble wrap
- rolling pins
- towels
- water in spray bottles
- Woolite - soap makes the fibers glide better, too much
makes it too slippery
- layering for felting:
Artfelt paper
foam
felting needles
underlayer for friction (bamboo curtain or rubber sheet)
thin veil to protect the wool
bands for tying the roll together
big stick to help roll it up.
- 30 something students and some helpers hopefully
How to:
Making the sunflower heads:
- 4 students help make 2 big yellow rounds for the
sunflower head, see Oli video for an idea of the
technique:
http://www.youtube.com/watch?v=6cALKnFKp7o
When we have two rounds we can make cuts with
scissors and twist the ends to shape petals.
- 4 students make 2 brown/red rounds for the center of
the sunflower, see Oli video above.
- 6 students make 6 leaves for the sunflower stem,
see Oli video above.
- The rest of us will make the background and the stem
of the sunflower,
All the wool has to be combed, some seeds and grass
picked out, then layered, fibers in different directions, so
they can interlock.
Making the Background
We start with a foam layer and then Artfelt paper on top.
Two students can needle the wool so it stays on the paper.
The background has to be very thick (10 inches when
fluffy), in order to avoid holes.
A couple of students can specialize in the sunflower stems,
and lay them on top of the background.
When the background is done, we move over to a
'friction surface' and bubblewrap.
Assembly
We assemble the loose pieces (sunflower heads and leaves)
on top. We wet the whole thing down and add some
Woolite.
I found some plastic liners with holes to put over the wool
to put on top.
At this stage the wool is fragile and we start by just
massaging gently. This will take some time, 10-15 min.
Felting Stage
Once it feels safe, we can roll it all up and the kids can take
turns jumping on the bundle, rolling it, hitting it...it all helps
making the fabric stronger.
You can get rougher and rougher with the fabric as it
keeps getting stronger.
It takes a good amount of rolling to make into something
that holds together, something like 1600 rolls! You need to
do 200 rolls, change the direction of the rolling, do 200
more rolls, and so on...
You do the 'pinch test' to see that there are no loose
fibers, and you are at the point of minimum felting.
Once it holds together like one piece, felting it even more,
is called 'fulling'.
You can keep on shrinking the fabric up to 50 % if you
want a very hard piece, or stop earlier, depending on
what you want the finished result to look like.
Here are some other youtube videos that will give you an
idea:
www.youtube.com/watch?v=PEuiuoA7jbU
www.youtube.com/user/sockmonkeyhead#p/u/30/S7gRIzcgDLQ
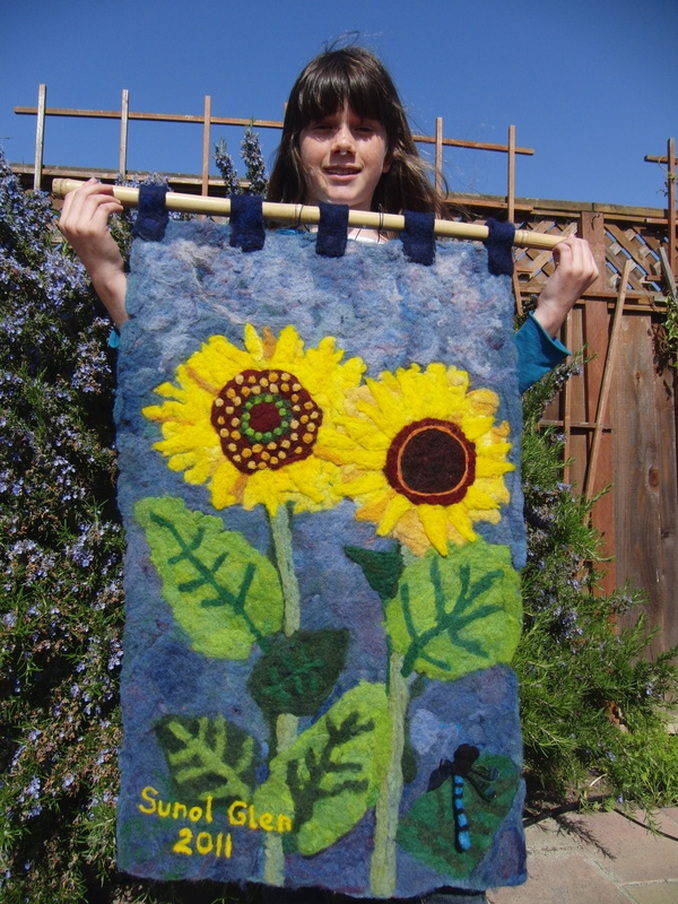
There are lots of possibilities for doing add-on work after
this phase is finished and dried. There could be ladybugs
and insects needle felted on, it as could other details, like
veins on the leaves. We can sign it.
The finished piece can be framed, or hung on a bamboo
stick.
********************************************************
Little Side Project: Making bracelet/snake
http://www.youtube.com/watch?v=d-TbtH5MjJU
If the kids need something to do while waiting for their
turn at the project, they can make snakes by wet
felting smaller pieces of wool.
Sara makes a snake/bracelet
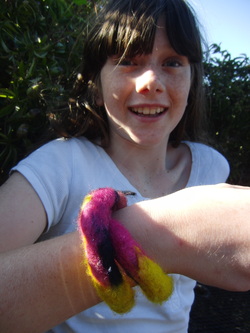
Wooly felted bracelet (or snake)
Sara experiments making solid felt piece
Experimenting with wet felting: Sara helping. I think the wool layer was not thick
enough so we got a lot of holes in the fabric. We'll try thicker next time. We also will try securing the wool with Artfelt paper. You needle felt the wool lightly on to it, and it will help keep it in place. (The paper is potato based and will dissolve when
you pour boiling water on top.
enough so we got a lot of holes in the fabric. We'll try thicker next time. We also will try securing the wool with Artfelt paper. You needle felt the wool lightly on to it, and it will help keep it in place. (The paper is potato based and will dissolve when
you pour boiling water on top.